Technical Guides
How to Load and Prime an Electric Grease Gun Without Air Lock
September 21, 2026 · SENLITE Admin
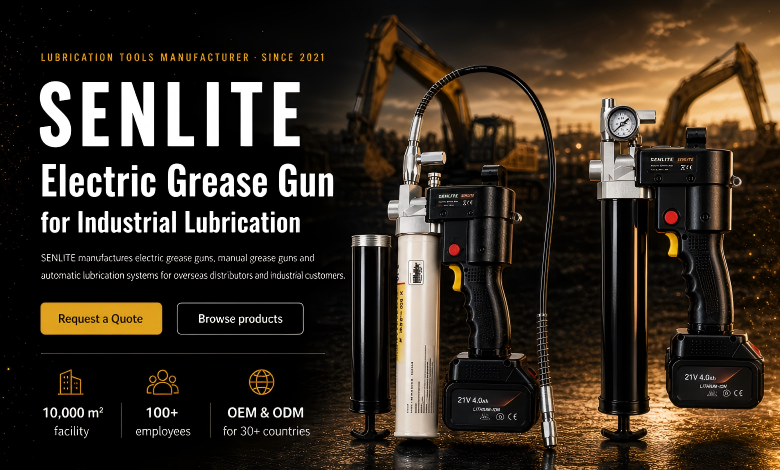
Changing a grease cartridge looks simple until the motor starts running and nothing comes out of the hose.
For technicians who grease excavators, loaders, tractors or other heavy equipment, this is more than an inconvenience. A cordless grease gun is supposed to save time when dozens of lubrication points need attention. Spending several minutes squeezing a new cartridge, opening the barrel and repeatedly pulling the trigger defeats the purpose.
In many cases, the grease gun itself is not damaged.
The problem is trapped air.
After a cartridge change, an air pocket can remain between the grease supply and the pump inlet. The motor may sound completely normal, but the pump is moving air instead of grease.
This guide explains how to load and prime a grease gun correctly, how to avoid air lock, and what to check when the gun runs but no grease comes out.
Why a Grease Gun Can Run Without Pumping Grease
A grease gun pump needs a continuous supply of grease at its inlet.
When a full cartridge is installed, the follower mechanism pushes the grease toward the pump head. Ideally, grease reaches the inlet without interruption.
During a cartridge change, however, air can become trapped near the pump.
Grease is relatively incompressible. Air is not.
Instead of drawing a solid column of grease into the pumping mechanism, the gun may repeatedly compress and expand the trapped air.
The result is familiar:
the motor runs;
the pump sounds active;
the battery is charged;
but no grease reaches the coupler.
This is why increasing pressure is usually not the first solution.
A high-pressure grease gun cannot develop useful outlet pressure until grease actually reaches the pumping mechanism.
Step 1: Keep Dirt Away From the Grease System
Before opening the barrel, wipe dirt and old grease away from the gun head, barrel threads and surrounding surfaces.
Grease guns are often used beside excavators, loaders and agricultural machinery where dust, sand and old grease are common.
Once contamination enters the cartridge or pump inlet, it can eventually reach the fitting and the component being lubricated.
Clean grease going into a dirty grease gun is no longer clean grease.
Use a clean rag and avoid placing the open gun head directly on a dirty workbench, truck bed or machine surface.
Step 2: Retract and Secure the Follower Rod
Pull the follower rod fully backward and lock it according to the grease gun's design.
The purpose is to remove spring pressure while the old cartridge is being removed and the new one installed.
Do not simply unscrew the barrel with the follower still pushing forward.
A controlled cartridge change is cleaner and makes it easier to seat the new cartridge correctly.
Step 3: Remove the Empty Cartridge
Unscrew the grease barrel from the pump head.
Remove the used cartridge and inspect the inside of the barrel.
A small amount of grease is normal. Large amounts of contamination, damaged cartridge material or hardened grease should be cleaned before installing another cartridge.
If you are changing to a grease that may be incompatible with the previous product, follow the grease manufacturer's compatibility recommendations.
Step 4: Install the New Grease Cartridge Correctly
Remove the plastic cap from the cartridge and insert the open end into the barrel first.
Push the cartridge fully into position.
Then remove the pull tab or foil seal from the other end.
Make sure the entire seal has been removed.
Pieces of packaging left around the opening can interfere with grease flow.
For standard cartridge systems, taking a few extra seconds here can prevent much more troubleshooting later.
Step 5: Reconnect the Barrel Without Trapping Air
Reconnect the barrel to the grease gun head.
If air is already trapped near the pump inlet, simply tightening everything completely and pulling the trigger may leave that air exactly where it is.
Depending on the grease gun design, trapped air can be released through an air-release valve or by allowing air to escape while the grease supply is pushed toward the pump.
On models equipped with an air-release or bleed valve, use that valve according to the manufacturer's instructions.
The objective is simple:
Replace the air pocket with grease before expecting the pump to build pressure.
Step 6: Release the Follower
Release the follower rod so that it can push the cartridge contents toward the gun head.
The follower should maintain contact with the grease supply rather than leaving an empty space behind it.
If the grease gun provides a method of manually assisting the follower during priming, use it according to the manufacturer's instructions.
Now the grease should be positioned against the pump inlet rather than separated from it by air.
Step 7: Bleed the Trapped Air
If the gun has an air-release valve, operate it.
Apply forward pressure from the follower until trapped air escapes.
The exact design varies between grease guns, but the principle is the same:
Air must leave before the pump can consistently draw grease.
Once grease begins reaching the pump cavity, close the bleed point securely.
Step 8: Prime the Gun Before Connecting It to the Machine
Do not immediately connect the coupler to an excavator or tractor fitting after changing the cartridge.
First, prime the grease gun with the outlet pointed into a suitable waste container or onto a clean disposable rag.
Operate the trigger briefly.
You may hear the pump tone change as air moves through the system.
Continue only until a steady grease flow appears.
Once the discharge becomes continuous rather than intermittent, the gun is primed.
Clean the coupler before connecting it to the grease fitting.
This simple check separates two different problems:
Is the grease gun pumping correctly?
or
Is the machine's grease fitting blocked?
That distinction can save a lot of unnecessary troubleshooting.
What If the Electric Grease Gun Still Does Not Pump?
If bleeding and priming do not restore grease flow, stop repeatedly pulling the trigger and check the system logically.
1. Check the Cartridge Installation
Confirm that:
the cartridge is facing the correct direction;
both required seals have been removed;
the cartridge is fully seated;
the follower is pushing correctly.
Incorrect cartridge installation can look very similar to a mechanical pump failure.
2. Check for a Persistent Air Pocket
An air pocket can remain trapped even after one attempt at bleeding.
Repeat the bleeding procedure before assuming that the motor or pump is faulty.
This is especially important after the grease barrel has been completely emptied.
3. Check the Grease Condition
Very cold or unusually stiff grease requires more effort to move.
Temperature can significantly change grease consistency.
A grease gun that primes easily in a warm workshop may behave differently after spending a cold night in a service truck.
Grease grade, ambient temperature and equipment requirements should therefore be considered together.
4. Test the Gun Before Blaming the Zerk
Disconnect the coupler from the machine and operate the gun briefly.
If grease exits the coupler normally, the pump is working.
The problem may instead be:
a blocked grease fitting;
hardened grease behind the fitting;
excessive restriction in the lubrication passage;
a damaged fitting;
or an incorrect coupler connection.
This distinction is especially important on older excavators and heavy machinery.
5. Inspect the Hose and Coupler
A grease gun may be producing pressure while grease is being restricted elsewhere.
Check the hose for damage, sharp bends and external leakage.
Inspect the coupler for contamination or damage.
A fitting that cannot seal correctly may leak grease around the zerk instead of forcing lubricant into the bearing or pin.
Priming Problems Are Not the Same as Pressure Problems
This is one of the most common mistakes when diagnosing an electric grease gun.
Operators sometimes assume:
The gun is not pushing grease, so it must need more PSI.
Not necessarily.
Pressure only becomes relevant after the pump is supplied with grease and the outlet encounters resistance.
If the pump inlet contains air, even a high-pressure grease gun cannot perform normally.
This is why a professional grease gun needs more than a high pressure number.
Buyers should also consider:
priming and air-release design;
grease delivery rate;
hose and coupler quality;
pressure-control and relief systems;
battery endurance;
ease of cartridge changes;
serviceability;
and performance under continuous use.
A specification sheet can tell you maximum pressure.
It does not always tell you how the gun behaves during a cartridge change beside an excavator.
That requires practical testing.
A Better Way to Evaluate a Cordless Grease Gun
For distributors and heavy-equipment maintenance teams, a useful product test should include more than a pressure gauge.
Try a repeatable cartridge-change test:
Empty the current cartridge.
Install a new cartridge using the normal procedure.
Start a timer.
Bleed and prime the gun exactly as an operator would in the field.
Record how long it takes to achieve stable grease flow.
Repeat the test several times.
Perform the same procedure at different ambient temperatures if cold-weather use is important.
This creates a practical measurement:
Cartridge change to stable grease output time.
For a maintenance crew servicing many machines, that number can matter almost as much as maximum PSI.
The same approach can be used to evaluate:
grease output per minute;
battery endurance;
temperature rise during continuous operation;
pressure-relief behavior;
performance with difficult fittings;
hose leakage;
and coupler accessibility in recessed locations.
These are the differences operators actually notice during a working day.
Why This Matters for Heavy Equipment
An excavator may have many lubrication points across the boom, arm, bucket linkage and other moving joints.
A loader, backhoe or agricultural machine presents the same basic challenge: maintenance is repetitive.
The value of a cordless grease gun is therefore not simply that it replaces hand pumping.
Its real value is consistency.
A professional tool should reduce the time and physical effort required to move from fitting to fitting while delivering grease reliably.
If the operator regularly loses several minutes after every cartridge change because the gun will not prime, the productivity advantage quickly disappears.
That is why loading and priming deserve attention when selecting an electric grease gun for professional use.
SENLITE's Approach to Electric Grease Gun Design
Dezhou Senlite Electromechanical Equipment Co., Ltd. manufactures SENLITE electric grease guns for equipment lubrication and professional maintenance applications.
The current SENLITE electric grease gun range includes the SLT2100 and SLT2400.
The SLT2400 is a 24V model with a 400 cc / 14 oz grease capacity and maximum pressure up to 10,000 PSI.
Its design includes functions related to grease handling, pressure control, air release and safe operation rather than relying only on maximum pressure as a selling point.
For distributors and professional buyers, the more useful question is not simply:
What is the maximum PSI?
It is:
How reliably does the tool load, prime and deliver grease during normal working conditions?
That is the type of performance that should be verified through repeatable testing.
FAQ
Why does my electric grease gun run but no grease comes out?
One of the most common causes immediately after changing a cartridge is trapped air between the grease supply and the pump inlet. Bleed the air and prime the gun before assuming that the pump has failed.
How do I get air out of a grease gun?
Use the gun's air-release or bleed mechanism if provided while allowing the follower to push grease toward the pump. The objective is to remove the air pocket and establish a continuous grease supply to the pump.
Should grease come out before I connect the gun to a zerk fitting?
Yes. After changing a cartridge, verify that the gun produces a steady grease flow before connecting it to the machine. This makes it easier to distinguish a grease gun problem from a blocked fitting.
Why is my grease gun not building pressure?
First confirm that the gun is fully primed. If grease flows freely from the coupler but pressure cannot be developed against a fitting, inspect the coupler, hose, fitting and lubrication passage for leakage, damage or blockage.
Does cold weather affect electric grease gun performance?
Low temperatures can make grease more difficult to move and can also affect battery performance. Grease grade, ambient temperature and equipment requirements should therefore be considered when diagnosing cold-weather lubrication problems.
Is maximum PSI the most important specification for a cordless grease gun?
No. Maximum pressure matters for resistant lubrication points, but professional users should also consider grease flow, priming, pressure relief, battery endurance, hose and coupler design, continuous-use performance and serviceability.
Related products
Related articles
Electric Grease Gun vs Automatic Lubrication System: Which Is Better for Heavy Equipment?
Compare electric grease guns with automatic lubrication systems for heavy equipment. Learn about cost, maintenance, flexibility, lubrication control, and how to choose the right solution.
Will Any 14 oz Grease Cartridge Fit an Electric Grease Gun?
Learn how to check 14 oz grease cartridge compatibility, barrel dimensions, loading methods, and grease specifications before using an electric grease gun.
Grease Gun Coupler Types Explained: How to Choose the Right One for Heavy Equipment
Learn how to choose the right grease gun coupler for heavy equipment. Compare standard, locking, button-head and flush couplers, with tips on fitting compatibility, pressure ratings and safe use.