Technical Guides
Grease Gun Coupler Stuck on a Zerk Fitting? How to Release It Safely
October 19, 2026 · SENLITE Admin
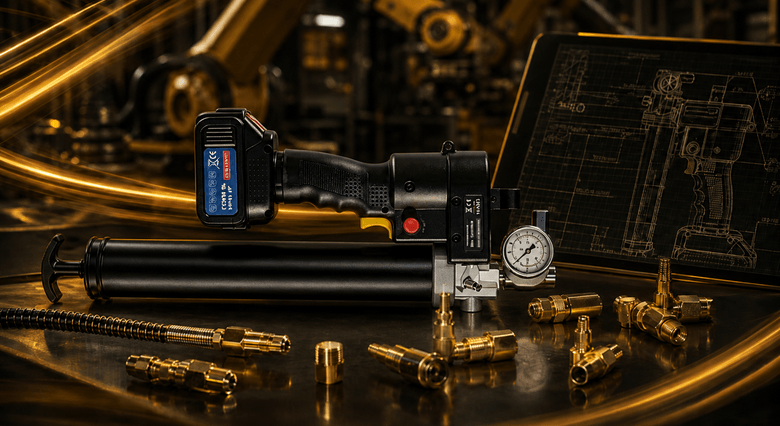
You have finished greasing an excavator pin, but the grease gun coupler will not come off the grease fitting. Pulling harder only makes the hose bend, and you are worried about damaging the fitting or the coupler.
This is a common maintenance problem with grease guns. In many cases, the coupler's internal gripping jaws are holding tightly against the head of the grease fitting. Pressure in the grease delivery system, an overly tight adjustable coupler, a worn fitting, or poor access can make removal more difficult.
The correct response is not to pull harder or immediately replace the grease gun. First, stop operating the tool and follow its pressure-release procedure. Then use the removal method specified for the coupler design.
This guide explains why grease gun couplers get stuck, how to troubleshoot the problem safely, and how to prevent it during heavy equipment maintenance.
Why Does a Grease Gun Coupler Get Stuck?
A grease gun coupler connects the end of the high-pressure hose to a grease fitting, commonly called a Zerk fitting or grease nipple.
Many standard couplers use internal jaws that grip the head of the fitting. This connection must remain secure while grease is being delivered under pressure.
However, the same gripping mechanism can make the coupler difficult to remove after lubrication.
Several factors may contribute to the problem.
1. Pressure Remains in the Grease Delivery System
When grease encounters resistance inside a fitting, bearing, pin, or bushing, pressure can build in the delivery system.
Depending on the coupler design and operating conditions, this pressure can make the internal jaws grip the fitting more tightly.
This is particularly relevant when a lubrication point is restricted or the operator continues pumping after grease flow has stopped.
However, a stuck coupler does not automatically prove that the fitting is blocked. The coupler itself, its adjustment, and the fitting's condition must also be considered.
2. The Coupler Is Adjusted Too Tightly
Some grease gun couplers have an adjustable nose that changes how tightly the internal jaws grip the fitting.
If the coupler is adjusted too tightly, it may attach securely but become difficult to release.
Do not assume every coupler uses the same adjustment mechanism. Some designs are adjustable, while others require a different removal procedure.
Check the instructions for the specific coupler before turning any part of it.
3. The Grease Fitting Is Worn or Damaged
A grease fitting can become worn, corroded, deformed, or contaminated after repeated use in harsh environments.
A damaged fitting head may prevent the coupler jaws from releasing normally.
This can happen on excavators, loaders, agricultural machinery, and other equipment exposed to dirt, moisture, vibration, and repeated maintenance.
If the fitting is visibly damaged, inspect it according to the equipment manufacturer's service procedure. Do not use the grease gun hose to pull a damaged fitting out of its mounting.
4. The Hose Is Pulling the Coupler Sideways
The position of the grease gun can also affect removal.
If the hose is sharply bent or pulled sideways, the coupler may bind against the fitting.
This is common when grease points are located behind guards, inside narrow spaces, or close to other machine components.
A coupler that releases normally when the hose is aligned but becomes difficult to remove at an awkward angle may indicate an access or alignment problem.
5. Dirt or Hardened Grease Is Interfering With the Connection
Dirt and hardened grease can accumulate around the coupler jaws and the head of the grease fitting.
Contamination may interfere with proper engagement or release.
Cleaning the exterior of the fitting before lubrication and wiping the coupler after use help reduce this risk.
If the coupler is visibly damaged, cleaning alone may not restore reliable operation.
How to Remove a Stuck Grease Gun Coupler Safely
The correct procedure depends on the grease gun and coupler design. Follow the manufacturer's instructions for your specific model.
Step 1: Stop the Grease Gun
Release the trigger and stop the tool.
If the tool is battery-powered, prevent accidental activation according to the manufacturer's instructions before handling the coupler.
Secure the equipment and ensure that moving attachments cannot shift unexpectedly.
Do not continue pumping in an attempt to force the coupler to release.
Step 2: Relieve Pressure According to the Manufacturer's Procedure
If the grease gun has a documented pressure-release mechanism, use it exactly as instructed.
Keep your hands and face away from the outlet and any potential discharge path.
Do not loosen the high-pressure hose, coupler connection, or other pressurized fittings as an improvised way to release pressure. Pressurized grease can cause serious injection injuries.
If the pressure cannot be safely relieved using the documented procedure, stop and obtain guidance from the equipment or tool manufacturer.
Step 3: Align the Hose With the Grease Fitting
Once the system has been made safe according to the manufacturer's instructions, support the hose so it is not pulling the coupler sideways.
Avoid using the hose as a lever.
Side loading can make a tight connection more difficult to release and may damage the fitting or hose.
Step 4: Use the Correct Coupler Release Technique
For many conventional push-on grease gun couplers, the manufacturer's instructions describe a controlled removal movement commonly summarized as "tilt, twist, and pull."
The basic idea is to release the coupler jaws without using the hose to force the fitting sideways.
Follow the instructions for your particular coupler. The direction and amount of movement may differ between designs.
If the coupler has an adjustable nose, change its adjustment only as directed by its manufacturer.
Do not assume that twisting the entire hose connection or loosening the hose nut is an appropriate release method.
Step 5: Stop if the Coupler Still Will Not Release
If the coupler remains stuck, do not keep increasing force.
Avoid hammering the coupler, using large pliers to crush its body, or prying against the grease fitting.
These actions can damage the fitting, coupler, hose, or surrounding machine components.
Instead, check the coupler instructions for the approved next step. If the connection remains trapped or pressure cannot be confirmed as relieved, have a qualified technician inspect it.
How to Identify the Real Cause
Removing the coupler is only the first part of solving a recurring problem. If the same issue happens repeatedly, identify why it is happening.
What you observeWhat to investigateCoupler sticks on many different fittingsCoupler adjustment, wear, contamination, or removal techniqueCoupler sticks on one particular fittingFitting condition, fitting geometry, access angle, or local resistanceGrease leaks around the coupler during pumpingCoupler engagement, worn jaws, damaged fitting, or a poor sealHose bends sharply during removalRestricted access, poor alignment, or excessive side loadingCoupler becomes difficult to remove after grease stops flowingPossible pressure buildup or a restricted lubrication path
These observations help narrow the investigation, but none of them independently confirms a particular fault.
If the Coupler Sticks on Every Fitting
Inspect the coupler itself.
Look for worn jaws, damaged threads on an adjustable nose, hardened grease, corrosion, and other visible damage.
Check whether the coupler is designed for the fittings being serviced.
If adjustment and cleaning do not resolve the issue, replacement or professional inspection may be necessary.
If the Coupler Sticks on Only One Fitting
Inspect the specific fitting and its location.
The fitting may be damaged, unusually shaped, poorly accessible, or associated with a lubrication point that has excessive resistance.
If grease delivery is also difficult, investigate the fitting and lubrication passage according to the machine manufacturer's instructions.
Do not repeatedly force grease into a suspected blockage simply because the coupler is difficult to remove.
If Grease Leaks Around the Connection
Leakage around the coupler can indicate poor engagement, worn jaws, a damaged fitting, or a connection that is not properly aligned.
Stop pumping and inspect the connection after making the system safe.
If grease is not entering the lubrication point, distinguish a coupler sealing problem from a blocked fitting or internal passage before replacing parts.
How to Prevent a Grease Gun Coupler From Getting Stuck
Preventive practices can reduce repeated interruptions during equipment maintenance.
Keep the Fitting Clean
Wipe dirt and old grease away from the fitting before attaching the coupler.
This helps prevent contamination from entering the lubrication system and accumulating around the connection.
Connect the Coupler Straight
Whenever access permits, align the coupler with the fitting before applying grease.
Avoid sharp hose bends and positions that place unnecessary sideways force on the connection.
Use the Correct Coupler
Check compatibility with the fitting type, available space, and intended working pressure.
A coupler that is too large for a recessed fitting may be difficult to attach and remove even if it is otherwise in good condition.
Avoid Pumping Against a Suspected Blockage
If grease flow stops and resistance rises unexpectedly, stop and diagnose the problem.
Continuing to operate a high-pressure grease gun against a restricted lubrication point can increase pressure without resolving the underlying cause.
Inspect the Coupler Regularly
Check for:
Worn or damaged internal jaws
A loose or damaged adjustable nose
Cracks or deformation
Hardened grease and contamination
Leakage during operation
Replace damaged components according to the manufacturer's instructions.
Follow the Correct Lubrication Procedure
Use the specified grease, quantity, and maintenance interval for the equipment.
Do not assume that every lubrication point should be filled until grease leaks out. The correct procedure depends on the component design and the manufacturer's instructions.
Why High-Pressure Grease Guns Require Extra Care
Electric grease guns can make heavy equipment maintenance faster by reducing repetitive manual pumping.
However, high pressure makes correct handling especially important.
A tool's maximum pressure rating does not mean every hose, coupler, fitting, or accessory can withstand that pressure.
Before using a grease gun, verify that the accessories are compatible with the tool and rated for the intended application.
Never check a suspected leak with your hand. Pressurized grease can penetrate the skin and cause a serious medical emergency. If grease is injected into the skin, seek emergency medical care immediately, even if the wound looks small.
Safe pressure handling is part of proper lubrication maintenance, not an optional extra.
What B2B Buyers Should Check When Selecting an Electric Grease Gun
For distributors, maintenance companies, and heavy equipment service providers, coupler usability is worth evaluating alongside pressure and grease output.
Before selecting a cordless electric grease gun, consider:
Coupler compatibility: Can the supplied connection work with the fittings commonly found on the target equipment?
Hose rating: Is the hose rated for the intended working pressure?
Access to lubrication points: Is the hose long and flexible enough for the application without forcing the coupler into an awkward position?
Pressure management: Does the tool documentation explain how to handle pressure safely during operation and maintenance?
Replacement parts: Can worn hoses, couplers, and other serviceable components be obtained?
Technical support: Can the supplier provide clear operating instructions and troubleshooting guidance?
These questions help buyers evaluate the complete lubrication system instead of comparing maximum PSI alone.
SENLITE Electric Grease Guns for Professional Maintenance
Dezhou Senlite Electromechanical Equipment Co., Ltd. (SENLITE) specializes in the development and manufacturing of electric grease guns and industrial lubrication tools.
Its current electric grease gun range includes the SLT2100 and SLT2400.
The SLT2400 is a 24V electric grease gun rated for maximum working pressure up to 10,000 PSI, with a 400 cc (14 oz) grease capacity and grease output up to 130 g/min.
These specifications describe the tool's capabilities. They do not eliminate the need to check coupler compatibility, inspect fittings, follow the operating instructions, and handle pressure correctly.
For professional users and distributors, a reliable lubrication solution combines suitable tool performance with correct accessories, clear documentation, and safe maintenance practices.
Frequently Asked Questions
Why won't my grease gun coupler release from the Zerk fitting?
Possible causes include pressure remaining in the grease delivery system, a coupler adjusted too tightly, worn or damaged fitting geometry, contamination, or sideways loading. Stop the tool and follow the manufacturer's pressure-release and removal procedures.
Should I twist or pull harder to remove a stuck grease coupler?
No. First make the system safe according to the manufacturer's instructions. Some conventional couplers use a controlled tilt, twist, and pull motion, but the correct procedure depends on the design. Excessive force can damage the fitting or coupler.
Can a blocked grease fitting cause the coupler to get stuck?
A restricted lubrication point can contribute to pressure buildup and difficult removal. However, a stuck coupler does not prove that the fitting is blocked. Inspect the connection and diagnose the actual cause.
Should I loosen the grease gun hose to release a stuck coupler?
Do not loosen a pressurized hose or coupler connection as an improvised release method. Use the tool's documented pressure-release procedure. If pressure cannot be safely relieved, stop and seek qualified assistance.
When should a grease gun coupler be replaced?
Consider replacement when the coupler has worn or damaged jaws, a damaged adjustment mechanism, persistent leakage, cracks, deformation, or recurring connection problems that cannot be corrected through approved cleaning and adjustment.
Can I use the same coupler on every grease fitting?
Not necessarily. Fitting geometry, available space, coupler design, and pressure requirements can affect compatibility. Confirm that the coupler is suitable for the fittings and working conditions involved.
Final Takeaway
A grease gun coupler that will not release is often a connection problem, but pressure, fitting condition, coupler adjustment, and access can all contribute.
The safest approach is to stop the tool, follow the manufacturer's pressure-release procedure, align the connection, and use the release method specified for the coupler.
If the problem keeps returning, inspect the coupler and grease fitting rather than repeatedly applying force.
For heavy equipment maintenance, correct pressure handling, compatible accessories, clean fittings, and proper troubleshooting are essential parts of reliable lubrication.
Related products
Related articles
Electric Grease Gun vs Automatic Lubrication System: Which Is Better for Heavy Equipment?
Compare electric grease guns with automatic lubrication systems for heavy equipment. Learn about cost, maintenance, flexibility, lubrication control, and how to choose the right solution.
Will Any 14 oz Grease Cartridge Fit an Electric Grease Gun?
Learn how to check 14 oz grease cartridge compatibility, barrel dimensions, loading methods, and grease specifications before using an electric grease gun.
Grease Gun Coupler Types Explained: How to Choose the Right One for Heavy Equipment
Learn how to choose the right grease gun coupler for heavy equipment. Compare standard, locking, button-head and flush couplers, with tips on fitting compatibility, pressure ratings and safe use.